DIY Photobooth: Complete Setup Guide for 2026
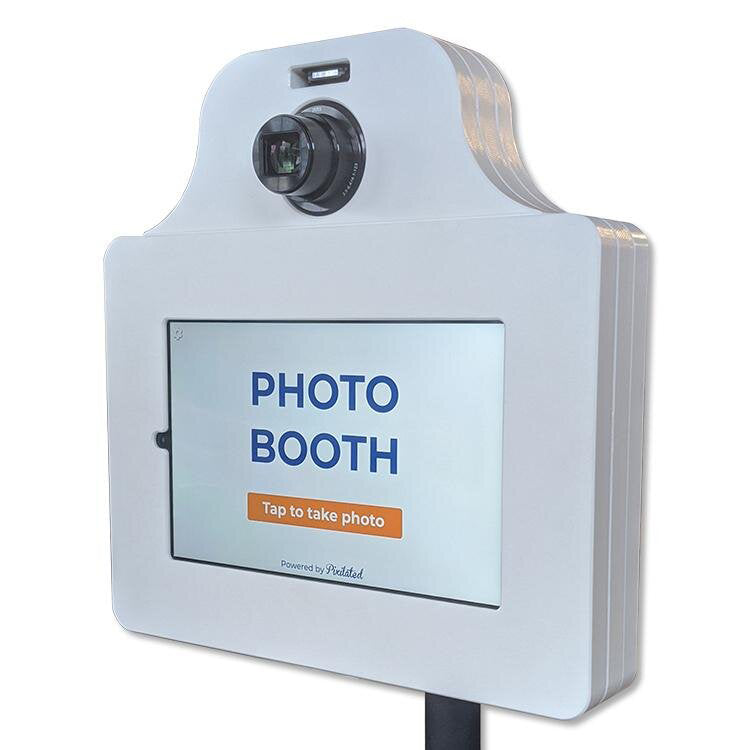
Pixilated Photo BoothCreating a memorable event experience doesn't require hiring expensive vendors or dealing with complex logistics. A diy photobooth offers an affordable, customizable solution that puts you in complete control of your event's photo experience. Whether you're planning a wedding, corporate gathering, or birthday celebration, building your own photo booth setup allows you to tailor every aspect to match your vision while delivering professional-quality results that guests will love sharing on social media.
Understanding DIY Photobooth Fundamentals
Building a diy photobooth starts with understanding the core components that make these setups successful. At its foundation, every photo booth requires a camera system, lighting solution, backdrop, and method for triggering photos and sharing results.
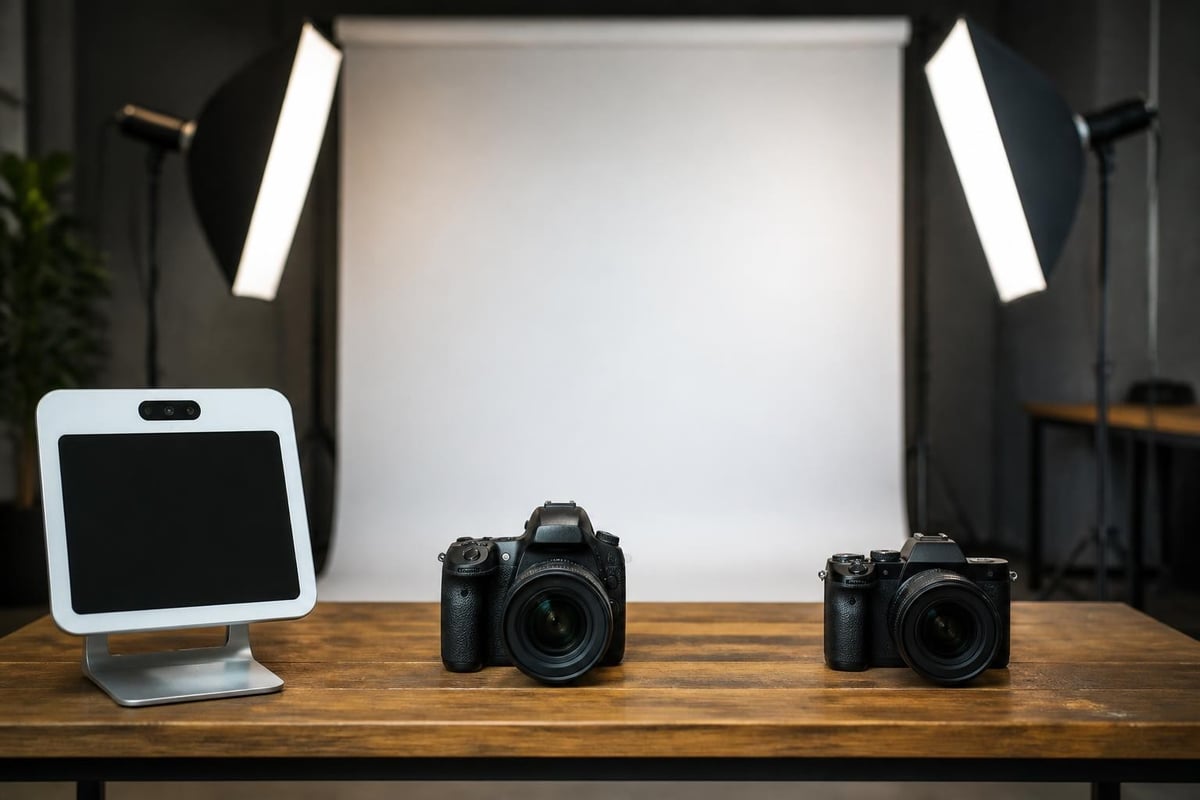
The camera system serves as your booth's heart. You'll choose between tablet-based systems, DSLR cameras, or mirrorless setups depending on your quality requirements and budget constraints. Each option offers distinct advantages in portability, image quality, and ease of use.
Equipment Selection Strategies
Camera Options:
- Tablet-based systems: iPad or Android tablets with dedicated apps
- DSLR cameras: Canon Rebel or Nikon D3500 for professional quality
- Mirrorless cameras: Sony Alpha series for compact professional results
- Webcam setups: Budget-friendly option for casual events
Beyond the camera, selecting the right photo booth equipment involves balancing quality, portability, and your technical comfort level. Many successful DIY builders start with simpler tablet systems before graduating to more advanced DSLR configurations.
| Equipment Type | Cost Range | Image Quality | Setup Difficulty | Best For |
|---|---|---|---|---|
| Tablet System | $300-$600 | Good | Easy | Beginners, casual events |
| DSLR Setup | $600-$1,500 | Excellent | Moderate | Professional events, weddings |
| Mirrorless Kit | $800-$2,000 | Excellent | Moderate | Frequent use, portability needs |
| Webcam Basic | $100-$300 | Fair | Very Easy | Budget parties, small gatherings |
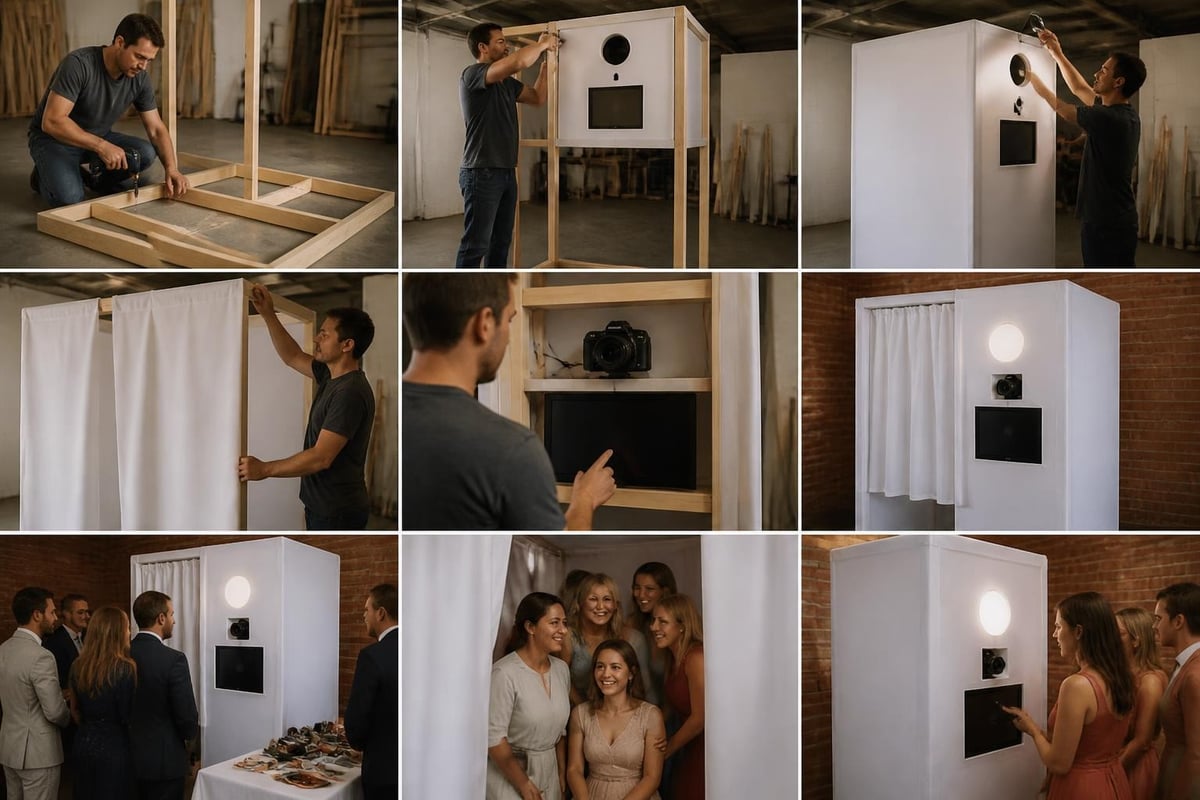
Building Your Photo Booth Structure
The physical structure determines how your diy photobooth integrates into event spaces and influences guest interaction. Building a reliable photo booth structure requires careful planning around dimensions, materials, and assembly methods.
Frame Construction Methods
Most DIY builders choose between PVC pipe frames, wooden structures, or portable tent-style enclosures. PVC offers lightweight portability and tool-free assembly, making it ideal for frequent transport between events. Wood provides superior stability and customization options but increases weight and setup complexity.
PVC Frame Advantages:
- Lightweight and portable
- No tools required for assembly
- Affordable materials at hardware stores
- Easy to modify and adjust dimensions
Wooden Frame Benefits:
- Enhanced stability for outdoor events
- Professional appearance
- Supports heavier equipment and backdrops
- Long-term durability
A standard booth footprint measures 8 feet wide by 8 feet deep, providing comfortable space for groups of four to six people. Height typically reaches 7-8 feet to accommodate standing adults and backdrop coverage.
For creating a collapsible design, incorporate hinged joints or quick-connect fittings that allow rapid assembly and breakdown. This portability proves essential when transporting your booth between multiple event locations or storing it between uses.
Lighting Setup and Techniques
Professional-quality photos demand proper lighting regardless of venue conditions. A diy photobooth lighting system eliminates harsh shadows, reduces red-eye, and ensures consistent results throughout your event.
Essential Lighting Components
Ring lights provide the most popular solution for DIY builders, delivering soft, flattering illumination that works well for portraits. Position a 18-inch ring light directly behind or beside your camera for optimal results.
Alternatively, integrated lighting control systems using Arduino or similar microcontrollers offer advanced automation. These setups synchronize lighting with camera triggers, creating professional studio-style flash effects.
Three-Point Lighting Setup:
- Key light: Main illumination positioned 45 degrees from subject
- Fill light: Softer light opposite key light to reduce shadows
- Back light: Rim lighting separating subjects from backdrop
For budget-conscious builders, construction work lights with diffusion material create surprisingly effective results. Mount two 500-watt LED work lights on tripods, cover them with white shower curtains or diffusion fabric, and position them at 45-degree angles flanking your camera.
Backdrop Design and Installation
Your backdrop establishes visual context and branding opportunities for every photo. The right backdrop transforms ordinary snapshots into shareable memories that reflect your event's personality.
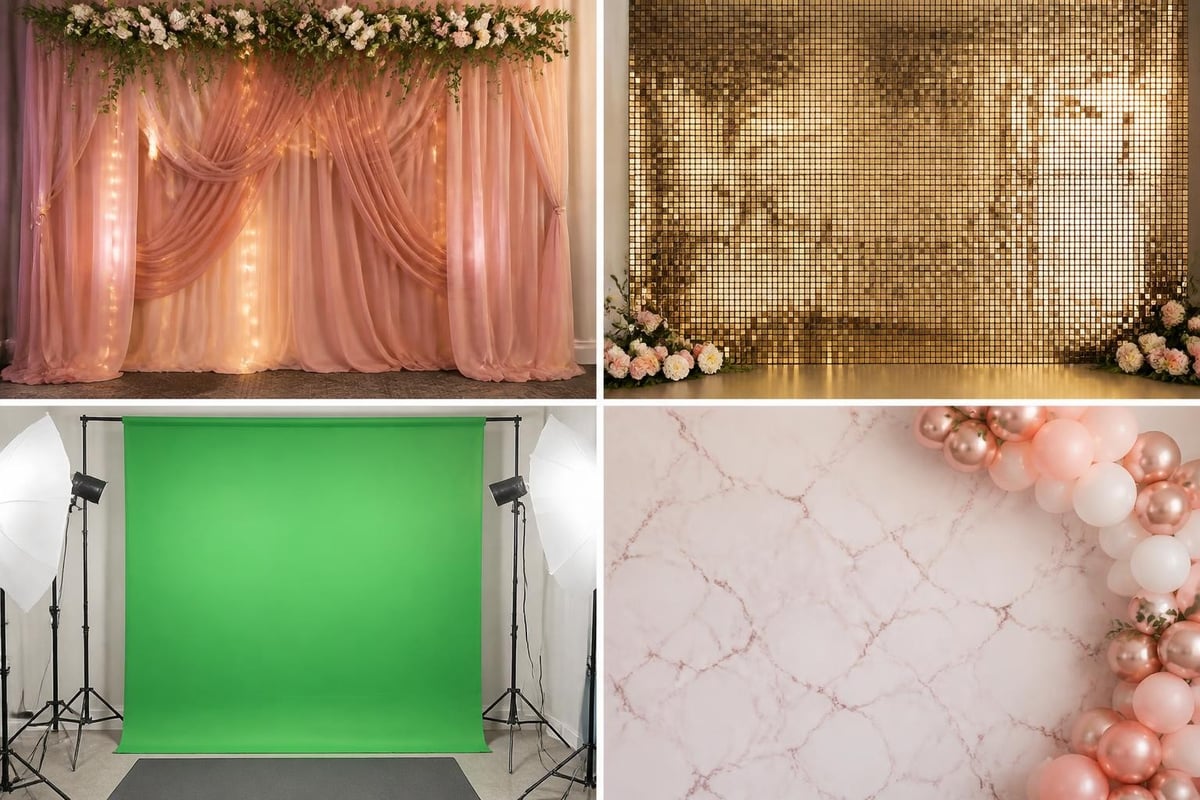
Backdrop Material Options
Fabric backdrops offer versatility and professional appearance. Polyester and muslin materials resist wrinkles better than cotton while providing rich color saturation. For Instagram-inspired aesthetics, consider sequin fabrics that photograph beautifully under photo booth lighting.
Greenscreen technology enables unlimited virtual backgrounds, perfect for corporate events requiring brand consistency across multiple locations. Quality greenscreen fabric costs $30-$80 for an 8x8 foot backdrop, and most photo booth software includes chroma key functionality.
DIY Backdrop Installation:
- Use backdrop stands with adjustable crossbars
- Secure fabric with clamps every 12-18 inches
- Steam or iron materials before events
- Pack backup fabric for outdoor wind conditions
Software and Photo Delivery Systems
Modern diy photobooth experiences depend on software that manages photo capture, editing, and instant sharing. Your software choice impacts guest experience more than any other component.
Photo Booth Software Solutions
Professional applications like dslrBooth, Sparkbooth, and Breeze Systems offer comprehensive features including customizable layouts, instant filters, and automated sharing. These platforms typically cost $100-$300 for lifetime licenses.
Key Software Features:
- Touchscreen interface for guest operation
- Custom overlay templates and branding
- Instant email and text message delivery
- Social media integration (Instagram, Facebook)
- GIF and boomerang creation
- Print queue management
For tablet-based systems, Simple Booth and Pixilated's proprietary software provide intuitive interfaces that guests navigate without assistance. These solutions work particularly well for event photo booth rentals where quick setup and minimal troubleshooting matter most.
When operating in venues with unreliable internet connectivity, offline mode functionality becomes critical. Understanding the basics of photo booth operation helps you prepare backup plans for photo storage and delayed delivery.
Camera Settings and Configuration
Achieving consistent, high-quality images requires proper camera configuration tailored to booth lighting and typical subject distances. Whether using DSLR or tablet systems, specific settings optimize results.
DSLR Camera Settings
For building a professional DIY photo booth, configure your DSLR with these baseline settings as starting points:
| Setting | Recommended Value | Purpose |
|---|---|---|
| Aperture | f/5.6 - f/8 | Adequate depth of field for groups |
| Shutter Speed | 1/125 - 1/160 | Freezes motion, prevents blur |
| ISO | 400 - 800 | Clean images under booth lighting |
| Focus Mode | Single-shot AF | Consistent focus on center subjects |
| White Balance | Custom/Flash | Accurate skin tones |
Test these settings in your actual booth environment, adjusting based on your specific lighting setup. Continuous lighting requires different ISO values than flash-based systems.
Tablet Camera Optimization
Tablet-based systems simplify settings through automated photo booth apps, but manual adjustments improve results. Lock exposure and focus before events begin, ensuring consistent brightness across all photos regardless of subject clothing or backdrop changes.
Props and Guest Engagement Elements
Creative Prop Categories:
- Oversized glasses and mustaches
- Speech bubble signs with custom messages
- Industry-specific items (graduation caps, sports equipment)
- Seasonal decorations matching event themes
- Brand elements for corporate functions
Strategic prop placement encourages guest participation. Display props on dedicated tables near the booth entrance, organizing items by category in clearly labeled containers. This accessibility increases usage rates and creates more dynamic photos.
Assembly Process and Setup Timeline
Understanding the complete assembly sequence prevents last-minute complications and ensures smooth event execution. Creating unforgettable memories starts with proper preparation and methodical setup procedures.
Pre-Event Preparation Checklist
24 Hours Before:
- Charge all batteries and power banks
- Test camera equipment and software
- Print and prepare any physical props
- Verify backdrop and frame components
- Confirm venue internet availability
Day-of Setup Sequence:
Begin setup 90-120 minutes before guest arrival. Start with the frame and backdrop installation, as these elements require the most time and space. Next, position lighting stands and adjust angles for even coverage across the backdrop area.
Mount your camera system at appropriate height (typically 48-52 inches from floor to lens center) and connect to power sources. Configure software settings and run test sequences with team members posing as subjects.
Advanced Features and Customization
Elevating your diy photobooth beyond basic functionality creates memorable experiences that guests discuss long after events conclude. Advanced features distinguish exceptional booths from adequate setups.
Video and GIF Capabilities
Modern photo booths capture more than static images. Boomerang-style videos and animated GIFs generate significantly higher social media sharing rates compared to traditional photos. Most professional photo booth software includes these features as standard options.
Configure your system to offer guests multiple capture modes: single photos, photo strips, GIFs, and short video messages. This variety accommodates different sharing preferences and creates diverse content for event hosts.
Data Collection and Analytics
For corporate events and marketing activations, email capture functionality transforms photo booths into lead generation tools. Configure your system to require email addresses before photo delivery, building valuable contact lists while providing instant gratification to participants.
When planning your setup, consider investing in equipment protection. Photo Booth Insurance safeguards your investment against accidental damage during events, providing peace of mind with straightforward $100 deductible coverage that keeps your operation running smoothly.
Troubleshooting Common Issues
Frequent Challenges and Solutions:
| Problem | Cause | Solution |
|---|---|---|
| Blurry images | Camera movement or slow shutter | Use tripod, increase shutter speed |
| Dark photos | Insufficient lighting | Add fill lights, increase ISO |
| Red-eye effects | On-camera flash angle | Use off-camera lighting or diffusers |
| Slow sharing | Weak internet signal | Enable offline mode, batch send later |
| Inconsistent exposure | Auto settings varying | Lock exposure and white balance |
Maintaining backup equipment prevents complete failures. Pack extra batteries, charging cables, and a secondary camera system when possible. For professional events, redundancy ensures you deliver promised experiences regardless of technical difficulties.
Cost Analysis and Budget Planning
Building a functional diy photobooth requires honest budget assessment across equipment, materials, and ongoing supplies. Understanding photo booth costs helps set realistic expectations and prevents mid-project budget overruns.
Complete Budget Breakdown
Starter Kit ($400-$700):
- Tablet or basic camera: $200-$400
- Tripod and mount: $50-$100
- Ring light: $60-$120
- Backdrop and stand: $80-$150
- Props and accessories: $30-$80
Professional Setup ($1,200-$2,500):
- DSLR camera and lens: $600-$1,200
- Professional lighting kit: $300-$500
- Software license: $150-$300
- Premium backdrop system: $150-$300
- Frame construction materials: $100-$200
Long-term operating costs include printer supplies (if offering prints), prop replacements, and software subscription renewals. Budget $100-$200 annually for these recurring expenses.
Creative Theme Ideas and Inspiration
DIY photo booth ideas span countless themes and styles, limited only by imagination and event requirements. Successful themes integrate cohesive visual elements across backdrops, props, and photo overlays.
Popular Theme Categories:
- Vintage elegance with antique frames and sepia filters
- Tropical paradise featuring palm leaves and beach props
- Hollywood glamour with red carpet and paparazzi elements
- Rustic charm incorporating wood textures and natural materials
- Corporate branding with company colors and logo integration
Seasonal variations keep content fresh across multiple events. Spring florals, summer beach themes, autumn harvest elements, and winter wonderland designs provide natural rotation throughout the year.
Professional vs. DIY Considerations
While building your own photo booth offers creative control and potential cost savings, assessing your specific needs determines whether DIY makes sense for your situation. The advantages of renting professional photo booths include guaranteed performance, insurance coverage, and zero setup stress.
DIY Advantages:
- Complete creative control
- No rental scheduling constraints
- Reusable for multiple events
- Learning experience and skill development
Professional Rental Benefits:
- Guaranteed technical support
- No storage requirements between events
- Included delivery and setup services
- Insurance and equipment protection
For single-use events or situations where technical troubleshooting falls outside your comfort zone, professional services from companies like Pixilated Photo Booth eliminate risk while delivering reliable results. Their ship-to-customer model combines professional equipment quality with DIY flexibility, offering a middle ground between fully DIY builds and traditional staffed rentals.
Marketing Your DIY Photo Booth Services
Once you've mastered diy photobooth construction, monetizing your skills creates business opportunities. Marketing photo booth services requires demonstrating value through portfolio examples and strategic positioning.
Build your portfolio by offering discounted or free services to early clients in exchange for testimonials and photo samples. Document your setup process and results through professional photography, creating marketing materials that showcase your capabilities.
Marketing Channels:
- Wedding planner partnerships
- Corporate event coordinator outreach
- Social media advertising targeting engaged couples
- School and university event departments
- Local business networking groups
Pricing strategies should reflect your market position, equipment quality, and service level. Research local competitors and position yourself strategically based on your unique value proposition.
Building a successful diy photobooth combines technical skills, creative vision, and attention to detail that transforms ordinary events into shareable experiences. Whether you're constructing a booth for personal use or launching a photo booth business, the flexibility and cost-effectiveness of DIY approaches make professional-quality results accessible to everyone. For those seeking the perfect balance between DIY flexibility and professional reliability, Pixilated Photo Booth delivers ship-to-customer photo booth kits that eliminate complexity while maintaining creative control, making it simple to create high-quality, shareable photo experiences at events of every size.