Photo Booth Setup: Complete Guide for Event Success
Pixilated Photo BoothSetting up a photo booth requires careful planning, the right equipment, and attention to detail to ensure your guests have a seamless experience. Whether you're organizing a corporate event, wedding celebration, or brand activation, understanding the fundamentals of photo booth setup can transform a simple photo station into an engaging centerpiece that generates countless shareable memories. The modern photo booth landscape has evolved significantly, with DIY solutions and professional-grade kits now accessible to event planners, businesses, and individuals who want to create high-quality photo experiences without the traditional complexity or staffing requirements.
Essential Equipment for Your Photo Booth Setup
A successful photo booth setup begins with selecting the right hardware and software components. Your core equipment determines the quality of photos, reliability during events, and overall guest satisfaction.
Camera and Device Selection
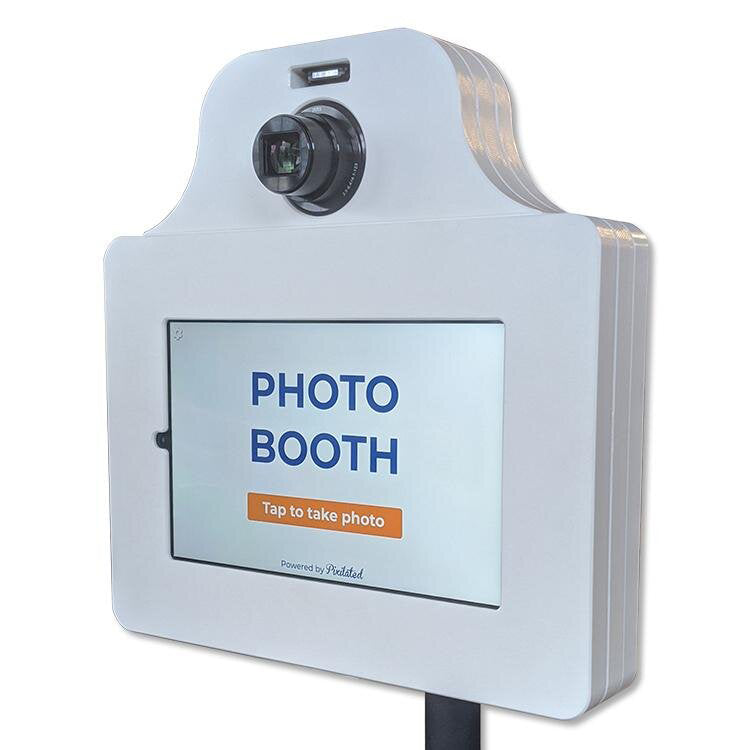
The foundation of any photo booth is the camera or device that captures images. Modern setups typically use one of three approaches: DSLR cameras, tablets, or dedicated photo booth kiosks. DSLR cameras provide exceptional image quality and professional-grade performance, while tablet-based systems offer portability and touchscreen convenience. When evaluating photo booth equipment options, consider factors like resolution, low-light performance, and compatibility with your chosen software platform.
Key camera features to prioritize:
- Minimum 12-megapixel resolution for crisp prints
- Remote trigger capability for hands-free operation
- Reliable autofocus system for group photos
- External power supply support for extended events
Lighting Solutions
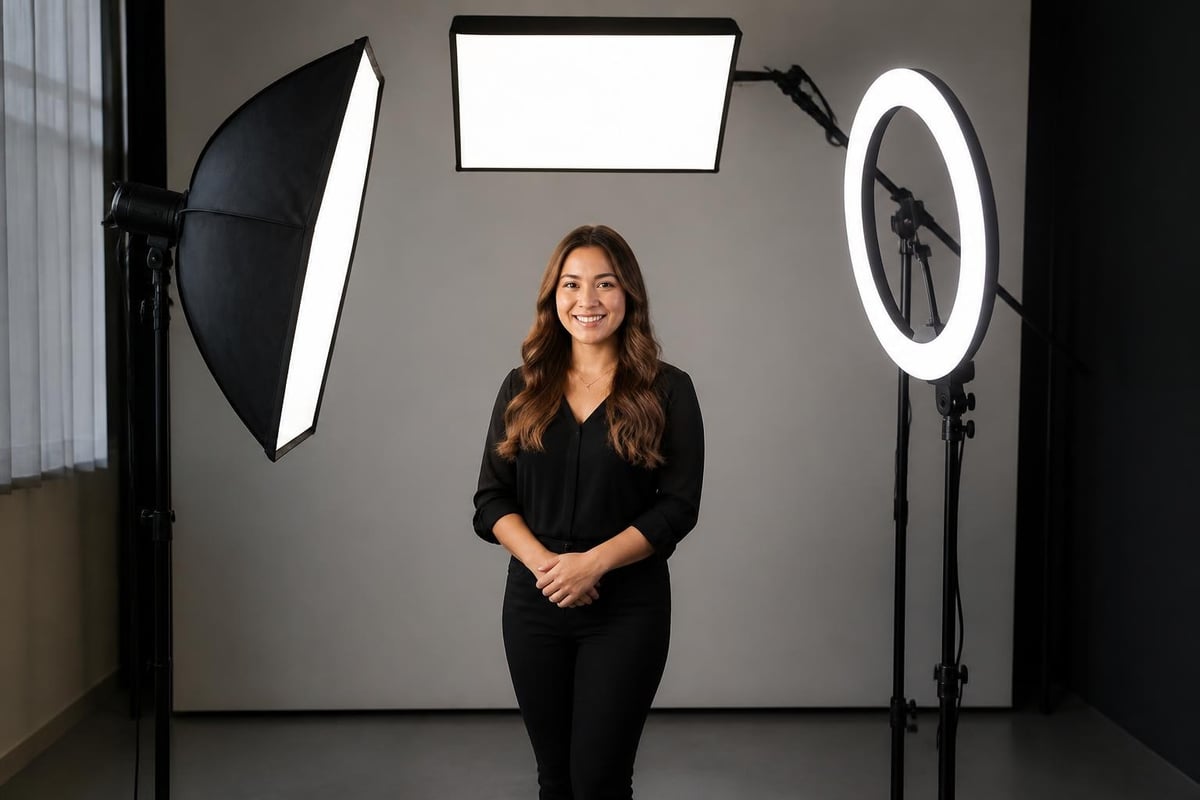
Proper lighting can dramatically improve photo quality and ensure consistent results throughout your event. Professional photo booth lighting eliminates shadows, reduces red-eye, and flatters all skin tones.
| Lighting Type | Best For | Typical Setup |
|---|---|---|
| Ring Lights | Portraits, close-ups | Single 18-inch positioned at camera height |
| Softbox Lights | Group photos, even coverage | Two units at 45-degree angles |
| LED Panels | Adjustable color temperature | Dual panel configuration |
Backdrop and Physical Structure
Your backdrop creates the visual foundation for every photo and reinforces your event theme or brand identity. Professional photo booth setup includes sturdy backdrop supports that can accommodate various materials without sagging or shifting during the event.
Standard backdrop dimensions range from 8x8 feet for intimate gatherings to 10x20 feet for larger installations. Consider the space requirements for different photo booth configurations when planning your layout, ensuring adequate room for guests to enter, pose, and exit smoothly.
Technical Configuration and Software Integration
Once you've assembled your physical equipment, the technical configuration determines functionality and user experience. Modern photo booth setup involves coordinating multiple software and hardware elements to create a cohesive system.
Software Platform Selection
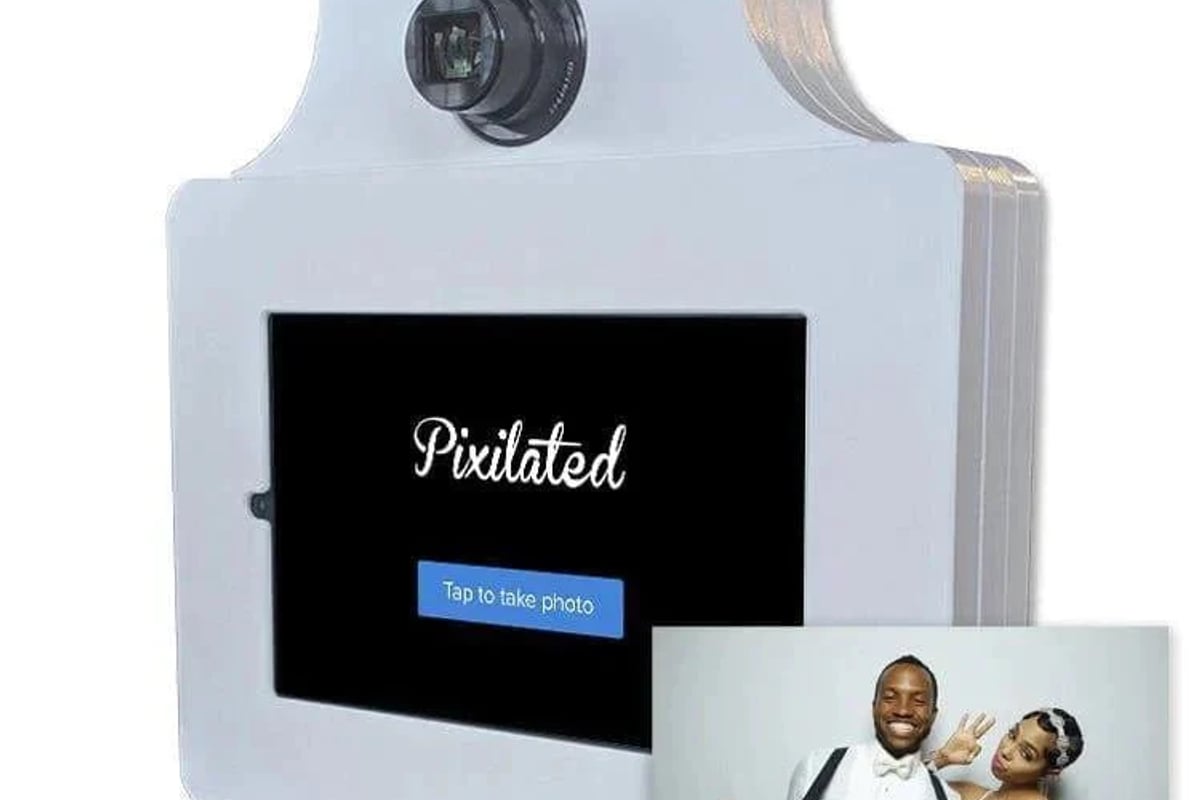
Your photo booth software controls image capture, editing, sharing, and data collection. Leading platforms offer customizable templates, instant social media integration, and real-time analytics. When configuring your system, prioritize software that provides:
- Intuitive guest interface that requires minimal instruction
- Customizable overlay templates for branding and personalization
- Multiple sharing options including email, SMS, and social platforms
- Data capture capabilities for marketing and follow-up
- Offline functionality for venues with unreliable connectivity
The Pixilated Photo Booth exemplifies modern DIY photo booth technology, shipping complete kits with pre-configured software that makes professional-quality photo experiences accessible without technical expertise. This approach eliminates the complexity of traditional staffed booths while maintaining enterprise-grade performance.
Printer Integration and Settings
For events requiring physical prints, integrating a dye-sublimation printer into your photo booth setup ensures high-quality, instant keepsakes. Dye-sub printers produce water-resistant, smudge-proof images that guests can take home immediately.
Printer configuration checklist:
- Install manufacturer drivers and test print quality
- Load sufficient media for expected guest count (calculate 2-3 prints per guest)
- Configure print size and layout in booth software
- Position printer for easy media replacement during events
- Test print speed to avoid guest queue buildup
Space Planning and Venue Considerations
Proper placement and spatial planning are critical components of photo booth setup that directly impact guest flow and photo quality. Your booth location affects everything from lighting conditions to participation rates.
Optimal Placement Strategies
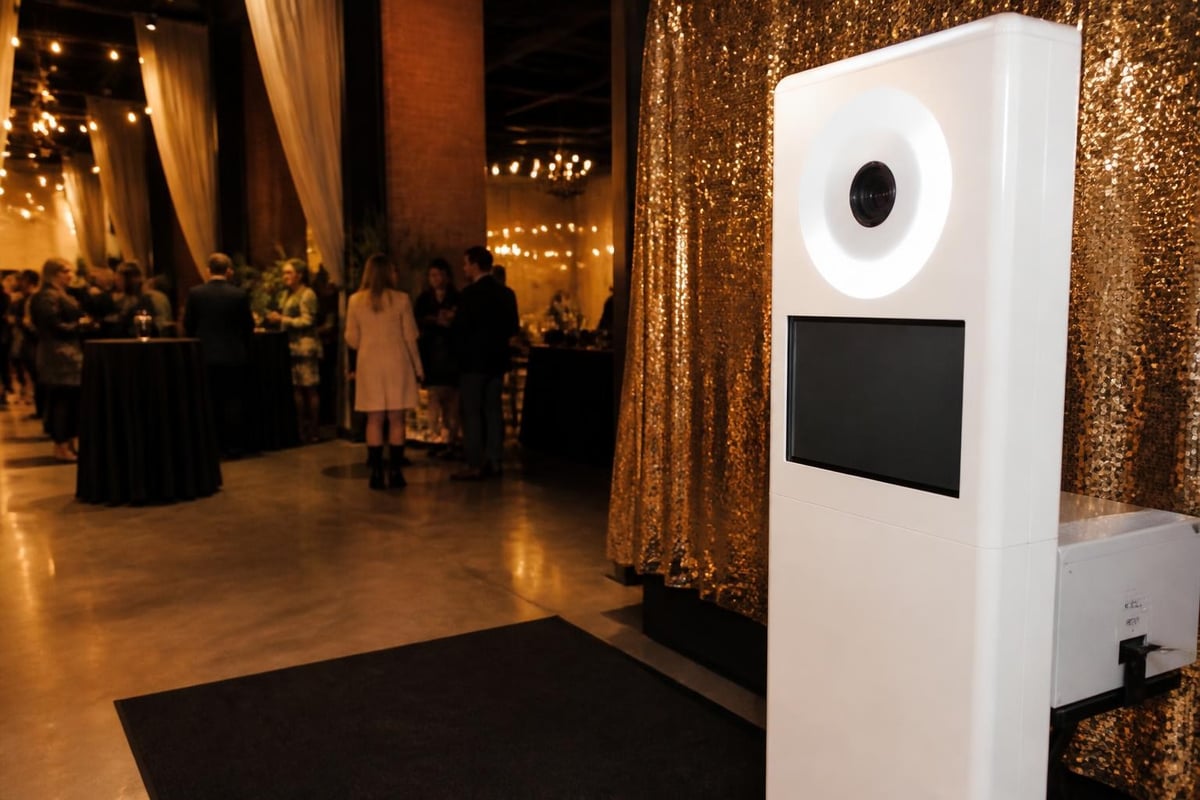
Position your photo booth in high-traffic areas where guests naturally congregate, but avoid blocking pathways or creating bottlenecks. Ideal locations include:
- Near entrance areas after check-in (captures guests while energy is high)
- Adjacent to bars or refreshment stations (capitalizes on natural gathering points)
- In corners with existing ambient light control
- Away from band stages or DJ setups (reduces audio interference and vibration)
Understanding the complete hardware setup requirements helps you identify suitable venues and prepare alternative configurations for challenging spaces.
Power and Connectivity Requirements
A reliable photo booth setup demands stable electrical power and, depending on your configuration, internet connectivity. Survey your venue in advance to confirm:
| Requirement | Standard Specification | Backup Solution |
|---|---|---|
| Power outlets | 110V, 15A minimum | Portable generator or battery packs |
| Internet speed | 10 Mbps upload minimum | Mobile hotspot or offline mode |
| Circuit capacity | Dedicated 20A circuit preferred | Load balancing across multiple circuits |
| Cable routing | Protected pathways | Cable covers and tape-down solutions |
Many modern photo booth configurations include offline capabilities that store photos locally and sync when connectivity resumes, ensuring uninterrupted operation even in venues with unreliable internet access.
Assembly and On-Site Installation Process
The physical assembly process requires methodical execution to ensure stability, safety, and professional appearance. A systematic approach to photo booth setup minimizes technical issues and reduces installation time.
Step-by-Step Assembly Protocol
Phase 1: Foundation Setup (15-20 minutes) Begin by establishing your backdrop support structure. Ensure the base is level and stable, using sandbags or weights to prevent tipping. Extension poles should lock securely at the desired height, typically 8-10 feet for standard backdrops.
Phase 2: Equipment Mounting (10-15 minutes) Mount your camera or tablet on a sturdy tripod positioned 6-8 feet from the backdrop. Adjust height to chest level for optimal framing of both individuals and groups. Install lighting equipment at appropriate angles, conducting test shots to verify even illumination across the capture area.
Phase 3: Technical Configuration (20-30 minutes) Power up all equipment and verify connections. Launch your photo booth software and confirm camera recognition, printer communication, and internet connectivity. Run multiple test captures to validate image quality, printing accuracy, and sharing functionality.
Phase 4: Final Touches and Testing (10-15 minutes) Add props, signage, and any decorative elements. Conduct end-to-end testing simulating the complete guest experience from approach to photo delivery. Document all settings for troubleshooting reference.
Common Setup Challenges and Solutions
Even experienced operators encounter obstacles during photo booth setup. Anticipating common issues accelerates problem resolution:
- Uneven lighting: Adjust light positioning incrementally, taking test shots after each change
- Backdrop wrinkles: Use a handheld steamer or tension clips to smooth fabric backgrounds
- Camera focus issues: Switch to manual focus and preset the distance to your designated posing area
- Printer jams: Keep media properly aligned and clean rollers between ribbon changes
- Software crashes: Restart the application and verify adequate device storage remains available
Maximizing Guest Experience Through Setup Optimization
Beyond technical functionality, thoughtful photo booth setup considers the complete guest journey and implements features that enhance participation and satisfaction.
Creating an Inviting Atmosphere
Your photo booth should visually communicate fun and accessibility. Strategic design elements encourage hesitant guests to participate:
Visual attraction techniques:
- Prominent signage with clear instructions and examples
- Strategic prop display showcasing creative possibilities
- Sample photos demonstrating booth capabilities
- Queue management systems for busy periods
- Attendant station for assistance without intrusion
The psychology of photo booth placement significantly impacts utilization rates. Wedding photo booth considerations emphasize creating intimate yet visible stations that balance privacy with accessibility, principles applicable across event types.
Props and Customization Elements
Props transform standard photos into memorable keepsakes. Your photo booth setup should incorporate organized prop displays that inspire creativity without creating clutter.
Effective prop management includes:
- Categorized storage with clear visibility
- Durable, easy-to-clean materials
- Event-appropriate themes and designs
- Regular rotation to maintain novelty
- Adequate quantity for simultaneous users
Customization extends beyond physical props to digital overlays, branded templates, and personalized sharing screens. These elements reinforce event themes and create cohesive visual experiences that align with your overall celebration or marketing objectives.
Advanced Setup Configurations and Special Considerations
As you gain experience with photo booth setup, advanced configurations unlock additional creative possibilities and address specialized event requirements.
Green Screen Integration
Green screen technology enables virtual background replacement, transforming any location into any scene. This setup requires additional equipment and careful lighting to achieve clean edge detection:
- Chroma key backdrop in vibrant green (avoid wrinkles that create shadows)
- Even, shadowless lighting across the entire green surface
- Software with real-time background replacement capabilities
- Pre-loaded or custom background images optimized for your camera resolution
Green screen photo booth setup demands precise lighting balance between your subjects and backdrop to prevent color spill and maintain realistic compositing.
Multi-Camera and 360-Degree Configurations
Innovative photo booth setups incorporate multiple synchronized cameras or rotating platforms for dynamic, sharable content. These installations require:
| Component | Standard Setup | 360-Degree Setup |
|---|---|---|
| Cameras | 1 DSLR or tablet | 8-12 synchronized cameras or 1 motorized rig |
| Space requirement | 8x8 feet | 12x12 feet minimum |
| Processing power | Standard tablet/laptop | High-performance computer |
| Software | Single-camera application | Multi-camera sync platform |
While complex, these advanced photo booth configurations create viral-worthy content that significantly increases social sharing and brand exposure at corporate events and marketing activations.
Remote and Outdoor Installations
Photo booth setup for outdoor or remote locations introduces environmental considerations absent from controlled indoor venues. Successfully navigating these challenges requires additional preparation:
Weather protection strategies:
- Weighted bases and guy-wire stabilization for wind resistance
- Waterproof equipment covers and canopy structures
- Temperature-controlled enclosures for extreme conditions
- Portable power solutions including generators and battery packs
Outdoor photo booths benefit from natural lighting but may require supplemental fill lighting to balance harsh shadows during midday sun or insufficient illumination during evening events.
Maintenance and Troubleshooting During Events
Even perfectly executed photo booth setup requires ongoing monitoring and maintenance throughout your event. Proactive attention prevents small issues from becoming guest-facing problems.
Real-Time Monitoring Checklist
Establish a regular inspection routine every 30-45 minutes:
- Check printer media levels and replace before depletion
- Review photo queue for processing delays
- Monitor storage capacity and clear cached files if needed
- Inspect backdrop condition for tears, wrinkles, or displacement
- Test sharing functionality across different guest devices
- Observe guest flow and adjust queue management as needed
Many professional operators use recommended equipment configurations that include backup components, enabling rapid replacement without event interruption.
Quick-Fix Solutions for Common Technical Issues
Problem: Photos appear too dark despite proper setup Solution: Increase ISO settings incrementally or add supplemental lighting at subject level rather than backdrop
Problem: Sharing features fail intermittently Solution: Verify internet connectivity strength and switch to mobile hotspot if venue WiFi proves unreliable
Problem: Guests complain photos look unflattering Solution: Adjust camera height (raise for slimming effect) and verify beauty mode or smoothing filters are enabled
Problem: Printer produces streaked or faded prints Solution: Clean printhead, verify ribbon installation, and confirm proper media type selection in software
Understanding how to properly set up photo booth systems includes developing troubleshooting instincts that minimize downtime and maintain guest satisfaction.
Post-Event Breakdown and Equipment Care
Efficient photo booth setup extends to professional teardown and equipment maintenance. Proper care preserves your investment and ensures reliability for future events.
Systematic Teardown Process
Reverse your assembly sequence while protecting delicate components:
- Power down software and export any locally stored photos
- Disconnect and coil cables using velcro straps to prevent tangling
- Clean printer and remove remaining media
- Wipe down touchscreens and camera lenses with appropriate cleaning solutions
- Fold backdrops along existing creases to minimize new wrinkles
- Inventory props and replace damaged items
- Pack equipment in dedicated cases with adequate cushioning
Taking photos of your setup configuration creates valuable reference documentation for future installations and helps identify missing components before leaving the venue.
Equipment Storage and Maintenance
Between events, proper storage protects your photo booth components and extends operational lifespan:
Environmental controls:
- Climate-controlled storage (avoid extreme temperatures and humidity)
- Dust-free containers or cases
- Elevated shelving to prevent water damage
- Organized labeling system for quick access
Regular maintenance schedule:
- Monthly battery charging cycles for portable power
- Quarterly software updates and security patches
- Annual calibration for cameras and printers
- Ongoing inventory of consumables (printer media, cleaning supplies, props)
Following manufacturer recommendations from resources like beginner equipment checklists ensures you maintain professional standards and avoid preventable equipment failures.
Professional Tips for Consistently Successful Setups
Experience reveals subtle refinements that distinguish amateur photo booth setup from professional installations. These insider strategies elevate guest experience and operational efficiency.
Pre-Event Preparation Strategies
Create detailed setup diagrams specific to each venue, documenting power outlet locations, optimal equipment placement, and potential obstacles. This preparation reduces on-site decision-making and accelerates installation.
Develop standardized checklists covering every setup phase, from initial equipment verification through final testing. Checklists prevent oversight and maintain consistency across multiple events.
Conduct dry-run installations in similar environments before major events. This practice reveals unexpected challenges and refines your timing estimates.
Build relationships with venue staff who can provide advance access for setup, identify optimal locations, and troubleshoot facility-specific issues like circuit breaker locations or WiFi credentials.
Enhancing the Guest Interface
The most technically perfect photo booth setup fails if guests find the interface confusing or intimidating. Design your user experience around simplicity:
- Limit on-screen options to essential functions
- Use large, clearly labeled buttons with intuitive icons
- Display sample photos demonstrating desired results
- Include brief, friendly instructions in multiple languages if appropriate
- Position the initial screen at average eye height for immediate visibility
Analyzing guest behavior patterns helps refine your setup over time. If participation lags, evaluate whether your photo booth is sufficiently visible, accessible, and inviting.
Scalability and Modular Design
As your photo booth operation grows, designing modular systems enables efficient scaling. Standardize components across multiple units so backup parts remain universally compatible. This approach also simplifies training for teams managing concurrent events.
Consider how DIY photo booth setups balance professional capabilities with accessible operation, making sophisticated photo experiences achievable without extensive technical backgrounds.
Mastering photo booth setup transforms event entertainment from a simple amenity into a powerful engagement tool that creates lasting memories and valuable marketing content. By combining the right equipment, thoughtful placement, technical preparation, and guest-focused design, you can consistently deliver exceptional photo experiences that exceed expectations. Pixilated Photo Booth simplifies this entire process with professional-grade DIY kits that ship directly to your event, eliminating complexity while maintaining the quality and reliability that guests and brands demand.