Photo Booth Stand: Setup, Selection & Best Practices
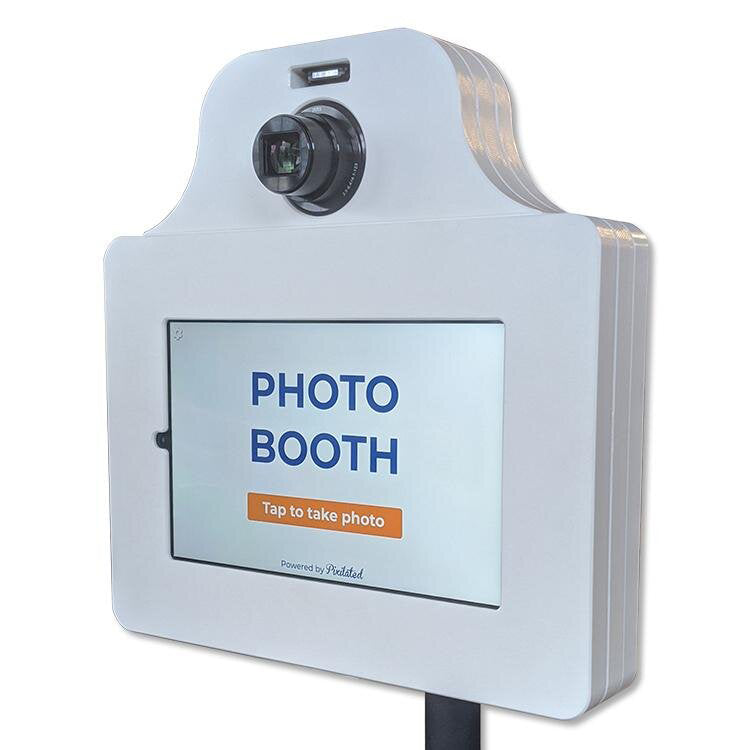
Pixilated Photo BoothA photo booth stand serves as the foundation for creating memorable event experiences, providing the structural support necessary to position cameras, tablets, and accessories at optimal heights and angles. Whether you're planning a wedding reception, corporate gathering, or private celebration, understanding how to select and configure the right stand can mean the difference between amateur snapshots and professional-quality keepsakes. The modern event landscape demands photo experiences that are both visually impressive and operationally reliable, making your choice of support equipment a critical factor in overall event success.
Understanding Photo Booth Stand Fundamentals
The photo booth stand functions as the central pillar of any self-service photography setup. This equipment holds cameras, tablets, ring lights, and other components at precise heights while maintaining stability throughout hours of continuous guest interaction.
Core Components and Construction
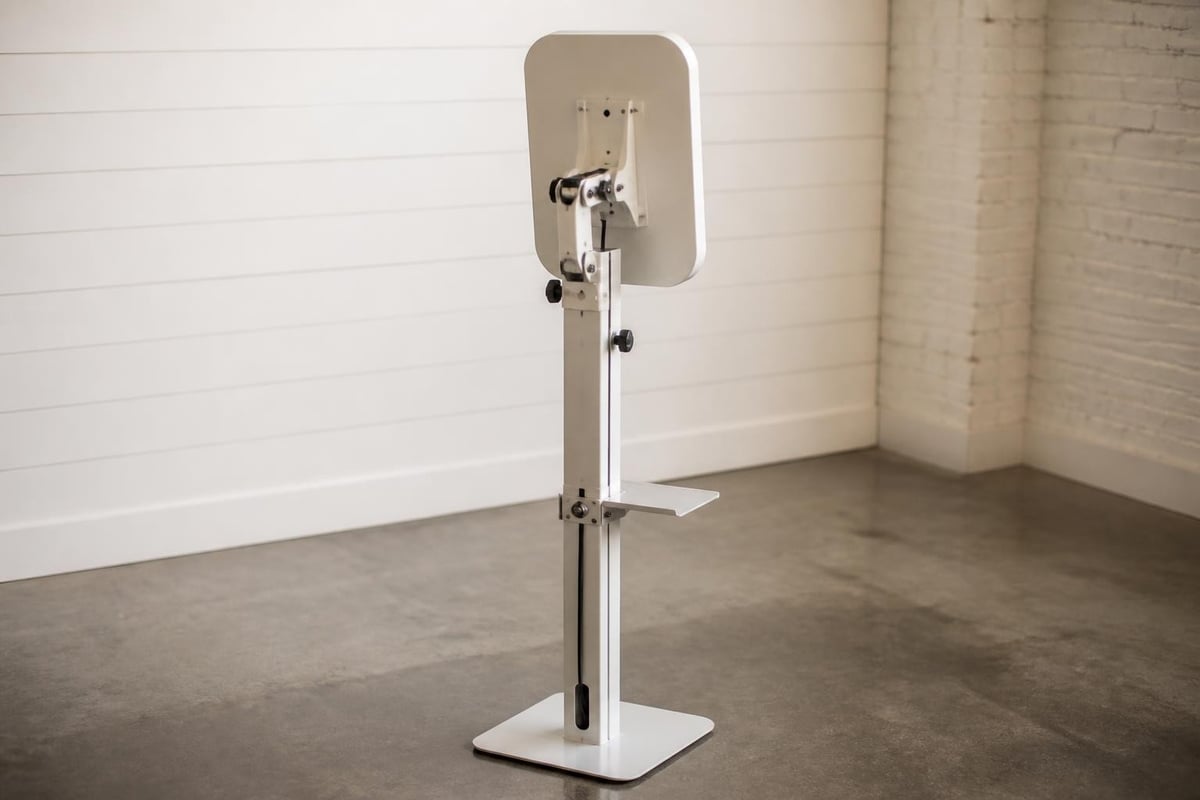
Modern stands typically feature adjustable height mechanisms ranging from 36 inches to 78 inches, accommodating diverse venue ceilings and guest demographics. The base design varies between tripod configurations, weighted platforms, and enclosed kiosk-style structures.
Key structural elements include:
- Adjustable center column with quick-release mechanisms
- Stabilizing legs or base platforms with non-slip surfaces
- Mounting brackets compatible with standard camera threads
- Cable management channels to prevent tripping hazards
- Collapsible designs for simplified transportation
Weight capacity represents another crucial specification. Professional-grade stands support between 15 and 35 pounds, sufficient for tablets, DSLR cameras, lighting equipment, and mounting accessories simultaneously.
Material Selection and Durability
Aluminum alloy construction offers the ideal balance between portability and strength. Steel alternatives provide superior stability for permanent installations but sacrifice mobility. Carbon fiber stands deliver premium performance at higher price points, particularly valuable for event professionals managing multiple bookings weekly.
Surface treatments matter considerably for longevity. Anodized finishes resist scratching and corrosion, while powder-coated options provide aesthetic appeal with reasonable durability for wedding photo booth rental applications.
Space Planning and Placement Strategies
Proper placement transforms a photo booth stand from functional equipment into an engaging focal point. The photo booth setup space requirements guide emphasizes allocating sufficient room for both the stand footprint and guest movement zones.
Calculating Footprint Requirements
Standard tripod stands require a 4-foot diameter clearance circle for leg extensions. Enclosed booth structures demand rectangular spaces measuring 8 feet by 8 feet minimum, with additional allowances for queuing areas.
| Stand Type | Floor Space | Height Clearance | Queue Zone |
|---|---|---|---|
| Tripod Setup | 4' diameter | 8' minimum | 6' x 4' |
| Enclosed Booth | 8' x 8' | 9' minimum | 10' x 4' |
| Kiosk Style | 3' x 3' | 7' minimum | 5' x 3' |
Ceiling height constraints affect both stand extension and lighting placement. Venues with 8-foot ceilings limit vertical expansion options, while spaces exceeding 12 feet may require auxiliary lighting to compensate for increased ambient distance.
Strategic Position Selection
Place your photo booth stand where natural traffic flows converge without obstructing emergency exits or catering stations. Corner positions maximize space efficiency while maintaining accessibility from multiple approach angles.
Lighting conditions dramatically impact photo quality. Avoid positioning stands directly beneath chandeliers or near windows with uncontrolled sunlight. The lighting guide provides comprehensive strategies for managing ambient conditions through supplemental equipment placement.
Equipment Integration and Mounting Techniques
The photo booth stand serves as the integration point for multiple technology components. Successful setups balance weight distribution while maintaining clean aesthetics and operational accessibility.
Camera and Tablet Positioning
Tablet-based systems require specialized mounting brackets with adjustable tilt mechanisms. Position screens at 58 to 62 inches from floor level for optimal guest interaction across age ranges. This height accommodates both standing adults and seated wheelchair users.
Mounting best practices:
- Verify thread compatibility before purchasing adapters
- Use safety cables as backup retention systems
- Position touchscreens at slight downward angles (10-15 degrees)
- Ensure power cable routing prevents tension on connections
- Test stability with simulated guest interaction force
DSLR camera installations benefit from quick-release plates enabling rapid angle adjustments. Remote trigger systems eliminate physical camera contact, reducing vibration risks that compromise image sharpness.
Lighting Configuration
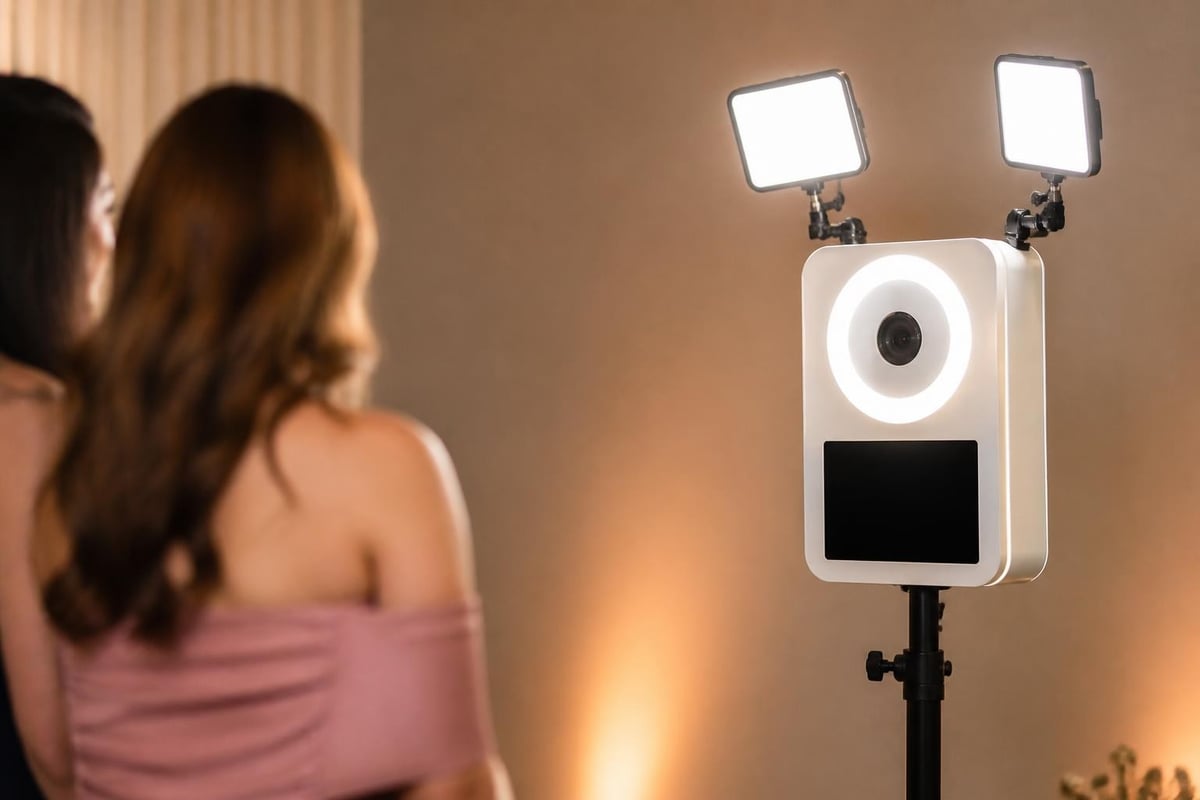
Ring lights represent the most popular illumination solution for photo booth stand setups. Mount these directly to the stand's center column above the camera position, creating shadow-free facial lighting from a single source.
Two-light configurations offer enhanced depth and dimension. Position key lights at 45-degree angles from the camera axis while maintaining consistent height relationships. The photo booth equipment setup guide details professional lighting ratios for various event environments.
Branding opportunities emerge through customized design elements integrated into your stand setup. Adding logos or custom graphics to backdrop frames creates cohesive visual experiences while reinforcing event themes or corporate identities.

Stability Solutions for Active Environments
Event environments present unique challenges to photo booth stand stability. Guest enthusiasm, venue flooring conditions, and extended operation periods demand proactive stability measures.
Weight Distribution Principles
Center of gravity management prevents tipping incidents. Concentrate heavier components (cameras, monitors) near the stand's vertical axis rather than extended on boom arms. Distribute accessories evenly around the center column when using circular mounting systems.
Sandbag weights provide adjustable ballast for tripod configurations. Position 10 to 15 pounds on each leg for outdoor events or venues with uneven flooring. Hook-and-loop straps secure weights without interfering with leg adjustments.
Flooring Considerations
Carpet installations benefit from wider foot pads that distribute pressure across larger surface areas, preventing leg penetration into pile fibers. Hard surface venues require rubber-tipped feet to prevent sliding during guest interactions.
| Surface Type | Recommended Base | Additional Stabilization |
|---|---|---|
| Carpet | Wide pads (3"+) | Minimal weight needed |
| Hardwood | Rubber tips | Sandbags on legs |
| Tile | Rubber tips | Adhesive floor marks |
| Grass/Outdoor | Stake anchors | Guy wires, 20+ lbs weight |
Outdoor photo booth stand deployments require specialized anchoring systems. Ground stakes, guy wires, and substantial weight (25+ pounds per leg) counteract wind loads that indoor setups never encounter.
Transportation and Storage Logistics
Photo booth stand portability directly impacts operational efficiency for rental businesses and frequent event hosts. Thoughtful selection minimizes setup time while maximizing durability across transport cycles.
Collapsed Dimensions
Tripod stands typically collapse to 36 to 42 inches, fitting within standard vehicle cargo areas. Quick-release leg locks enable tool-free deployment in under two minutes.
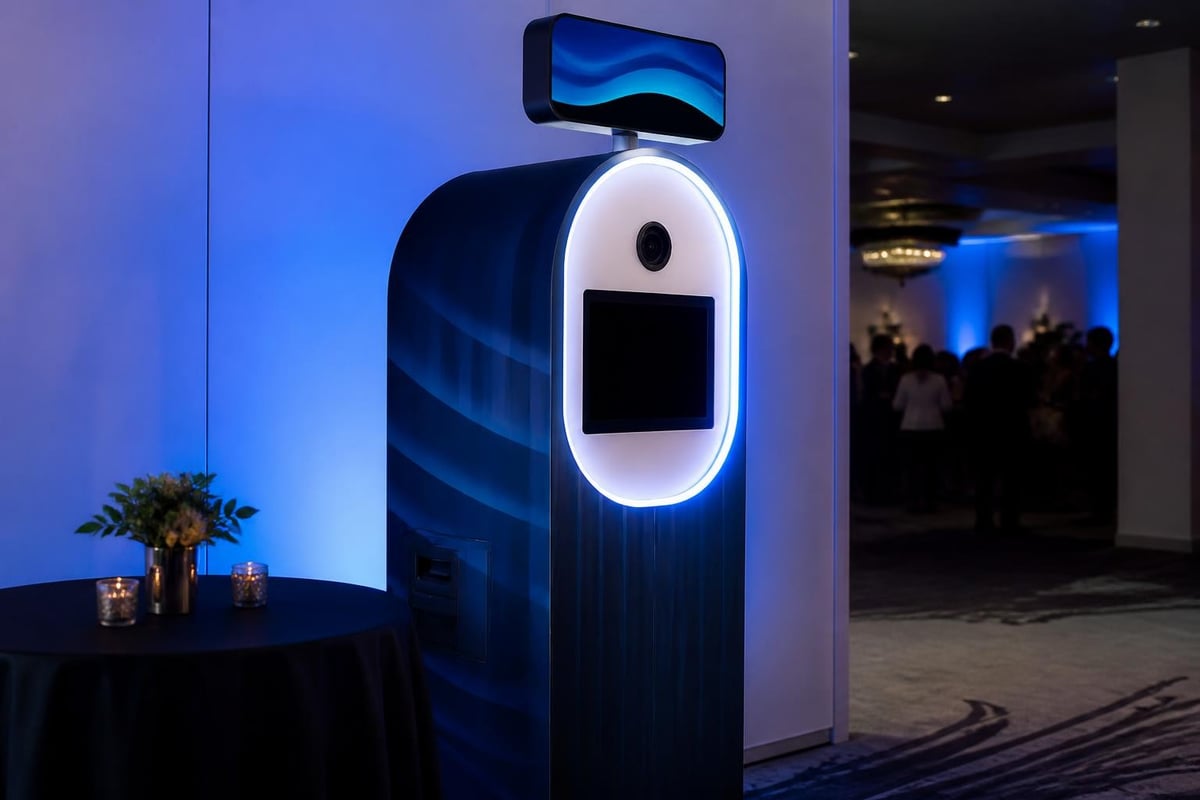
Enclosed booth structures disassemble into component panels for transport. Look for designs featuring wheeled cases that convert transportation containers into convenient setup carts.
Transport checklist:
- Verify all quick-release mechanisms lock securely
- Protect finish surfaces with padded cases or wraps
- Separate mounting brackets to prevent threading damage
- Document assembly sequences with photos for reference
- Maintain spare parts inventory (knobs, washers, pins)
Setup Time Optimization
Practice reduces deployment time from 15 minutes to under 5 minutes for experienced operators. The photo booth setup guide outlines systematic approaches that eliminate confusion and minimize error.
Create numbered component labels corresponding to assembly diagrams. This simple organizational strategy proves invaluable when deploying multiple units across simultaneous events or training new team members.
Safety Standards and Risk Mitigation
Professional photo booth stand deployment prioritizes guest safety alongside photographic results. Comprehensive risk assessment identifies potential hazards before they impact event experiences.
Tip Prevention Measures
The primary safety concern involves stand tipping from unbalanced weight distribution or guest contact. Apply the "push test" after initial setup-apply moderate horizontal force at camera height. Stable configurations resist movement without base lift.
Children represent unique considerations for photo booth stand placement. Position equipment beyond arm's reach of unsupervised minors, and consider barrier systems (stanchions, ropes) for high-traffic family events.
Electrical Safety
Cable routing affects both aesthetic presentation and trip hazard mitigation. Secure power cables to stand legs using reusable cable ties, creating smooth pathways that follow structural contours. Gaffer tape provides temporary floor adhesion for cables crossing walkways.
Ground fault circuit interrupter (GFCI) protection becomes mandatory for outdoor installations or venues with proximity to water features. Portable GFCI adapters cost under $30 while providing essential shock protection.
Customization and Branding Opportunities
The photo booth stand provides multiple surfaces for visual customization that reinforces event themes or corporate identities. Strategic branding transforms utilitarian equipment into cohesive design elements.
Structural Modifications
Fabric sleeves convert exposed tripod legs into branded columns matching event color schemes. Custom-printed wraps adhere to center posts without residue, offering temporary personalization for corporate event photo booth rental applications.
Topper signs mounted above camera positions create vertical visual impact while directing guest attention. Acrylic panels, foam board constructions, or suspended banners attach via mounting brackets without compromising stability.
Understanding photo booth design principles helps event planners integrate stands into broader decorative concepts rather than treating them as isolated equipment.
Digital Integration
Modern photo booth stands increasingly incorporate digital signage displays showing example photos, instructions, or brand messages. Tablet mounts accommodate secondary screens positioned at comfortable viewing angles without interfering with primary camera sightlines.
LED accent lighting adds dramatic flair for evening events. Battery-powered strip lights attach magnetically to metal stand components, offering wireless operation that eliminates additional cable management challenges.
Professional-Grade vs. Consumer Options
Photo booth stand selection involves balancing performance requirements against budget constraints. Understanding capability differences prevents mismatched expectations and operational disappointments.
Investment Tiers
Entry-level stands priced between $50 and $150 serve occasional home use but lack the durability for weekly rental deployment. Mid-tier professional options ($200-$400) provide acceptable longevity with moderate maintenance requirements.
Premium stands exceeding $500 incorporate advanced materials, precision engineering, and extended warranties suitable for high-volume commercial applications. These investments typically achieve payback within 20 to 30 rental events.
| Price Range | Build Quality | Typical Lifespan | Best Application |
|---|---|---|---|
| $50-$150 | Consumer grade | 25-50 events | Personal use |
| $200-$400 | Semi-professional | 100-200 events | Part-time rental |
| $500+ | Professional | 500+ events | Full-time business |
Feature Comparison
Consumer stands sacrifice adjustability for simplified operation. Fixed-height models reduce setup complexity but limit adaptability across diverse venue requirements. Professional alternatives offer infinite height adjustment within specified ranges, enabling precise positioning optimization.
Weight capacity differences become apparent under sustained use. Budget options rated for 15 pounds experience stress failures when supporting full equipment loads (tablet, ring light, backup battery, mounting accessories). Commercial stands rated for 30+ pounds maintain structural integrity across extended service lives.
Maintenance and Longevity Practices
Proper photo booth stand maintenance extends service life while ensuring consistent performance quality. Systematic care prevents mid-event failures that damage professional reputations.
Routine Inspection Protocols
Check all adjustment mechanisms before each deployment. Loose knobs, stripped threads, or bent components compromise stability and require immediate replacement. Maintain spare parts inventory including leg locks, mounting screws, and height adjustment collars.
Monthly maintenance tasks:
- Clean all surfaces with appropriate cleaners (avoid harsh chemicals on anodized finishes)
- Lubricate moving parts with dry lubricants (avoid oil-based products that attract dust)
- Inspect rubber feet for wear and replace when smoothed
- Verify mounting thread integrity using gauge tools
- Document any performance issues in maintenance logs
Aluminum stands resist corrosion but develop surface oxidation over time. Periodic application of aluminum polish restores original appearance without compromising structural properties.
Storage Best Practices
Store photo booth stands in climate-controlled environments when possible. Extreme temperature fluctuations stress adjustment mechanisms and accelerate material fatigue. Avoid leaning stands against walls-this creates bend stress on center columns.
Protective cases prevent transportation damage while organizing accessories. Foam inserts custom-cut to component shapes ensure everything returns to designated positions, simplifying inventory verification and setup preparation.
Venue-Specific Adaptation Strategies
Different event environments demand tailored photo booth stand approaches. Recognizing venue characteristics enables proactive configuration adjustments that optimize results.
Indoor Venue Considerations
Convention centers and hotel ballrooms typically provide consistent flooring, electrical access, and climate control. These controlled environments permit lighter stand configurations prioritizing portability over extreme stability measures.
Historic venues with uneven floors require additional leveling attention. Adjustable feet with broader ranges compensate for surface irregularities that tripod legs amplify. Test stability across the full intended footprint area rather than single points.
Outdoor Event Requirements
Garden weddings, festival booths, and outdoor corporate events expose photo booth stands to wind, uneven terrain, and variable lighting. Increase base weight by 50-100% compared to indoor specifications.
Ground stakes provide superior anchoring for grass surfaces. Drive 12-inch stakes at 45-degree angles outward from each leg position, connecting via adjustable guy wires that accommodate stand height changes.
Weather protection becomes critical for electronic components. Even covered venues experience wind-driven rain that damages unprotected tablets and cameras. Weatherproof housings or backup plans for rapid equipment relocation prevent costly damage.
Integration with Modern Photo Booth Technology
Contemporary photo booth experiences extend beyond simple photography, incorporating social media sharing, custom filters, and interactive features. Your photo booth stand must accommodate evolving technology requirements.
Tablet-Based System Requirements
Modern DIY photo booth systems utilize tablets as combined camera, interface, and processing units. Stands must support not only the tablet weight but also mounting brackets, protective cases, and cable connections.
Portrait versus landscape orientation affects mounting bracket selection. Portrait mode (vertical) requires brackets with rotation locks preventing gravitational sagging. Landscape orientations provide more natural interaction angles for groups but demand wider stability bases.
Power management integration distinguishes amateur from professional setups. Stands with integrated cable channels route power cords cleanly from floor outlets to mounted equipment. Battery backup systems eliminate outlet dependency but add weight considerations.
Accessory Mounting Solutions
Props, signage, and backup equipment require accessible storage without cluttering guest interaction zones. Stands with auxiliary mounting points support small shelves, hooks, or baskets positioned outside primary photo capture areas.
The photo booth props selection process benefits from dedicated storage integration. Wall-mounted prop holders waste valuable floor space-stands with built-in retention systems consolidate footprints while improving operational efficiency.
Cost Analysis and ROI Considerations
For rental businesses and frequent event hosts, photo booth stand selection represents an investment requiring careful financial analysis. Understanding total cost of ownership guides purchasing decisions beyond initial price comparisons.
Acquisition Costs
Quality stands range from $200 for basic tripod configurations to $1,200 for premium enclosed kiosks. Budget 10-15% of total photo booth system costs for stand components to maintain proportional quality standards.
Bundled packages sometimes include stands with camera and lighting kits. Evaluate whether included stands meet professional standards or represent cost-cutting measures that require eventual replacement.
Operational Expense Factors
Transportation costs vary with stand weight and collapsed dimensions. Compact designs reduce vehicle size requirements, potentially eliminating truck rental expenses for multi-event deployments.
Setup labor represents ongoing operational costs. Stands requiring 15+ minutes for deployment reduce event capacity compared to 5-minute quick-setup alternatives. For businesses managing multiple weekly bookings, labor efficiency directly impacts profitability.
Annual cost comparison:
| Factor | Budget Stand | Premium Stand |
|---|---|---|
| Purchase Price | $200 | $600 |
| Setup Time (minutes) | 15 | 5 |
| Events/Year | 50 | 50 |
| Labor Cost (@$25/hr) | $312.50 | $104.17 |
| 3-Year Total Cost | $1,137.50 | $912.51 |
Maintenance and replacement costs favor quality investments. Premium stands serviced annually last 5+ years, while budget alternatives require replacement every 18-24 months under commercial use conditions.
Troubleshooting Common Setup Challenges
Even experienced operators encounter photo booth stand complications during event deployments. Systematic troubleshooting approaches minimize downtime and maintain professional appearances.
Height Adjustment Failures
Stuck or loose height adjustments stem from debris accumulation or worn components. Quick fixes include applying penetrating lubricant to stuck collars (allow 10 minutes penetration time) or temporarily tightening loose sections with gaffer tape pending proper repair.
Stripped adjustment knobs prevent secure locking. Emergency solutions involve wrapping rubber bands around knobs to increase friction or using small C-clamps as auxiliary locks (pad clamp jaws to prevent finish damage).
Stability Issues
Unexpected wobbling during operation indicates improper weight distribution or compromised leg integrity. Redistribute equipment weight closer to the center column, verify all leg locks engage fully, and inspect for bent components requiring replacement.
Uneven surfaces challenge stability despite proper setup technique. Shim short legs using rubber pads, folded cardboard, or specialized leveling feet. Verify stability after shimming by repeating push tests from multiple directions.
Compatibility Problems
Mounting thread mismatches prevent equipment attachment. Carry adapter sets converting between 1/4-inch and 3/8-inch threads-the two standard camera mounting sizes. Step-up and step-down rings solve most compatibility challenges without requiring specialized tools.
Cable management complications often emerge during final setup stages. Pre-route cables during practice sessions, documenting optimal pathways with photos. Label cable destinations to eliminate trial-and-error reconnection efforts.
Selecting and deploying the right photo booth stand transforms event photography from basic snapshots into professional experiences that guests remember and share. By understanding structural requirements, stability principles, and integration techniques, event planners and rental professionals create reliable setups that operate flawlessly throughout celebrations. Pixilated Photo Booth delivers professional-grade DIY rental kits with comprehensive setup support, enabling you to create stunning photo experiences without the complexity or cost of traditional staffed services.